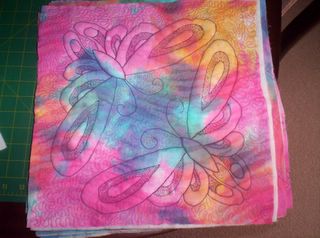
Trapunto Butterflies

Just as I've been slack with my posting, I've been slack with my quilting homework. =P The trapunto butterflies were the monthly assignment two months ago for my monthly class.
For the butterflies, first I stitched the fabric to one layer of batting, then I cut out the 'flat' parts, and then sewed it again with another layer- doubling the fat parts and giving a single layer of batting to the thin parts. Then, I stippled over the thin parts so that the fat parts 'popped'. So far I think this is the prettiest block, and I'm contemplating making a whole cloth (maybe crib sized) quilt with just the butterflies in different sizes all over it.
This is only one completed block, when I'm meant to complete two of everything. Soon I'll have the other block finished. Then I'll have to do last month's block, trapunto cording, and then this month's block, trapunto stuffed feathers. At least for those two blocks the 'quilting' is only cross hatching, which isn't so hard to do. It's the stippling that takes a while and hurts my foot. My course is nearly finished though, only one more set of twin blocks, and then the middle parts, borders, etc. and then I'll have a quilt, made with a whole lot of time and learned experience!


